Wednesday, January 29, 2014

Hello Flourish

Happy Wednesday friends! I just have to say.....I am over the moon excited with today's card!  I gotta say too that the photo just doesn't even give this card justice The colors involved are so beautiful and the camera just didn't pick them up like I had hoped it would...but what can ya do...right?

Anyway...here's my prized posession :)


I've had this Hero Arts Stamp for quite some time but just wasn't sure how to go about making it really....you know...POP! Today, while I was looking around at my stamps and trying to get some inspiration...it HIT.

I decided to stamp it on some Tim Holtz water color paper with versamark and heat emboss it with my white Hero Arts embossing powder. I then colored in the image with Distress Markers. I used several colors in the image which you could see and then blended the colors with an aquash brush.

I then fussy cut the image out and placed it onto a red pierced circle die from My Favorite Things. I then adhered that onto a cute polka dotted piece of card stock from the Doodlebug "Sweethearts" collection and added some ribbon I had on hand and some enamel dots from the same collection. The "Hello" sentiment is one that I used a few days ago from Simon Says Stamp.

I will try to take better pictures tomorrow so you can see how truly amazing the card and the colors look. But, in the mean time...I hope all is well with you and that you may find some inspiration to try something new and fun that brings you joy!

Until tomorrow......Happy Stamping :)

Tuesday, January 28, 2014

Love You!

Happy Tuesday friends! Just a quick card to share today made with exclusing Simon Says Stamp products and some beautiful glittery heart ribbon that I found at Costco! 

Enjoy!

Monday, January 27, 2014

Last Day of Homework :)


Today's card was inspired by a card that Jennifer McGuire made in an online card class I've been participating in. This card was made by creating my own stencil our of a die by Avery Elle....then using embossing paste by Wendy Vecchi and then covering the paste with four different colors of embossing powders. The sentiment I used is from Avery Elle and is actually from the same stamp set that Jennifer used on her card ...only she made a thank you card. And..... if you've been reading my posts you know I'm in need of Birthday cards right now, so I decided to go with a Birthday sentiment instead :)

I am just ecstatic with the results of this card...and can't wait to try this technique time and time again!

Enjoy!


Sunday, January 26, 2014

Nerdy Valentines

My adorable seven year old daughter and crafing partner was the inspiration behind tonight's card. She absolutely loves Lawn Fawn...but was especially tickled with the nerdy birds in this year's Valentine release...and begged me to use them in my next card. So, my dear daughter....here you go!


I started off using SSS's "falling heart" stencil and some white embossing paste from Wendy Vecchi. Before the paste dried....I added some Distress Stickles clear "Rock Candy" extra fine glitter. Then while those were drying....I die cut the Memory Box die called "Twirled Heart Border" on some patterned card stock from Bo Bunny's "Head over Heels" 6x6 Valentine pad and added to the right side of my card. Next, I added some black and white striped washi tape that I bought from Archiver's clearance sale (wasn't marked so I'm not sure of the brand) and placed my little nerdy birds over the top after coloring them with my Spectrum Noir markers. The Speech bubble die and sentiment were from a Valentine set specifically designed by Sizzix for Archiver's and were 3D mounted over the Twirled Heart Border die. And then lastly....I added a few embellishments..... including a puffy heart sticker from Reflections, some black pearls from Bo Bunny, and some black and white baker's twine that I have in my humongo stash.

Needless to say.....my daughter was very pleased with the card!

Enjoy :)


Friday, January 24, 2014

Stinkin' Cute

Hello Peeps! Today I'm sharing with you two cards that I made. The first card was made using some Simon Says Stamp products that I recently received in the mail. I've been eyeing this adorable skunk set for awhile now...and that heart background...what can I say...LOVE IT!


This second card was is my homework for my Online Card Class called "Stenciled". After masking off a diaganol section...I used a checkerboard stencil from Prima Flowers. First, I inked up the stencil with 'Festive Berries" distress ink and then moved the stencil over and inked it up again with "Peacock Flowers". I then filled up the diaganol with a "thanks you" die cut from memory box..but I only used the "thanks" which I die cut on some teal colored card stock I had on hand that just happened to match almost perfectly. Then, using the Paper Smooches "Many Thanks" set...I stamped the "Sincere" sentiment with the same barn door distress ink.

Lastly, I matted the image onto some of the same teal colored cardstock as well as some red card stock...and punched out a few red hearts, colored them with my clear Wink of STella, and then added them next to my sentiment.

It was fun using a stencil as my background image today! I can't wait to see what else there is to learn from this class. I'll make sure to share my homework again!

Enjoy:)


Tuesday, January 21, 2014

Life Is Good!

Just a quick post to share a card I whipped up tonight using the Hero Arts"Brush Strokes" set. I found the inpiration for this card on Pinterest...this is the picture:


And here is my card:


My inspiration obviously came from the different size circle patterns and color scheme. Fun, bright and cheery! Enjoy :)


Monday, January 20, 2014

Masculine Mania

Do you have trouble making masculine cards? I know that I certainly do! I don't know if its just cause its more fun to work with soft/bright colors....flowers....butterflies....etc. or if its just truly difficult to come up with different masculine ideas that work. Well, I have some great new for you. I have found the perfect stamp set for those men/boys in your life...and boy do I have a lot of them (no pun intended) In my house....there's not just the hubs, I also have four sons ranging from 11-20 and only one girl who is the youngest by four years.

 This stamp set makes it so much easier to make a quick masculine card. Its called "Dude" and was made by Hero Arts for the Operation Write Home charity. (If you haven't heard of this charity I definitely recommend  you look into it). I mean really....what man doesn't like football, cars and bacon right?

  Isn't it awesome! When I saw this set...I knew right away that I had to have it. 

  This is my first card using this set. A close friend of mine has a son the same age as my daughter and they've kinda grown up together. For is birthday this week, he requested that his Mom, Me, and my daughter Brooklyn go to Olive Garden for lunch....like we used to before they started school (isn't that adorable). So...one day this week my friend and I are going to check them out of school and fulfill his birthday wish as a surprise....and of course, we can't have a birthday lunch without a fun birthday card.


I chose the football and the finger for his card. He loves University of Utah football....so this was perfect. I used Utah's color scheme on my card and die cut a bunch of little stars with the "Starry Sky" die set from Lil' Inkers and matted some black card stock behind them. I then die cut some white stars with Lil' Inkers "Stitched Stars" die set. Next, I inked up the foam finger stamp with some Staze On Jet Black ink onto some red craft foam and fussy cut it out and placed it on one of my stitched stars. Then, I stamped the football with some Hero Arts Cup o' Joe Mid-tone Shadow Ink and fussy cut that out and 3-D mounted it on another star. Then lastly I stamped the Happy Birthday Sentiment onto the card and onto another stitched star and 3-D mounted that star over the top.....so cool! Lastly, I added some white sequin stars and dash lines around the card to finish it up!

  Here's a closer ook at that foam finger...I just love it!! This finger stamp will be a huge staple in my masculine card making...I can already tell :). 

  I hope you found this post very helpful and that you too can make some great cards for the men in your life with this set...I highly recommend it!


Enjoy!!


Sunday, January 19, 2014

A Sunday Full of Greats!

Today was a great day! I absolutely love Sundays. We start the day at church, learning about our Savior and feeling of his love. Then we come home and get to spend the day as a family...nowhere to go....just everyone under one roof for the entire day. 
Sunday is also a perfect day to craft. I am so calm and happy which makes for amazing inspiration and time to just craft my heart out while my houseful of boys watch football together! And then to top it off....Our team wins and is headed to the Super Bowl...Go SEAHAWKS! Like I said....a great day!

I made a ton of cards today but I won't bore you to death with the details of them all. I'll just take a second to post a few details on a couple of them and then just put the rest on here for you to check out and if you have any questions on them...please just leave a comment and I'll be happy to clue you in on how it came to be ;).

The first card I'm going to share was made using the Simon Says Stamp January Card Kit. I wasn't so sure about this little 3 eyed monster when this kit first came out, but my daughter absolutely adored him so I thought I would finally give him a try. This is what I came up with!


I stamped the image twice and made a girl and a boy monster by coloring them with copics. I then added some googly eyes and stacked them on top of each other so they look like they are locking eyes. I also made some flags out of some of the paper that came in the collection and made the background out of some papers from it as well. I stamped the sentiment from the same set and added a cute heart from Doodlebug and some sequins from my local craft store.

The next image is a huge favorite...I just love how it turned out:

The background was stamped with Hero Arts "Bubblegum" shadow ink using the Hero Arts "Large Vintage Alphabet" set for the x and the heart. I then die cut a tag from Lawn Fawn's "Tag, You're It" set and added these adorable elephants and sentiment from Lawn Fawn's "Love you Tons" set. I added some ribbon...a heart jewel from Hero Arts....and some glitter from my favorite clear "Wink of Stella" brush pen. I am just tickled with the results! What do you think?

Now for the rest! I'm just going to add the pictures and please please please...leave me a comment if you'd like to find out how I made them.

Enjoy!


Thursday, January 16, 2014

Where've You Been?

So you may have noticed that I haven't been very active over the last month and here's why. As per my profile...and if you've followed me from the beginning..you'll see that I am a contractor's wife. This means that my husband spends months at a time away from us, while he protects our diplomats and other Goverment/Military officials. So, as you may of guessed, he has recently headed back after 6 months of being home with us and I wanted to spend as much time as I could with him as possible over the Holidays before he left. And then, as you could hopefully understand, it takes me a week or two of getting back into my groove and over the depression of not having him around me 24/7.

This is one of the reason's I love this hobby. The happiness paper crafting brings me and other's is a wonderful distraction from my everyday life stresses of raising 5 children alone while my husband is away for months working one of the most dangerous jobs on earth. Whew! What a crazy life I live ;).

Now for the cards....


As I stated yesterday in my post, I am in desparate need of Birthday cards. So, I decided to get working on some bright and cheery cards to help lift my mood.

For both of my cards, I used  the same elements.  Both were made using the Hero Arts "Butterfly and Flowers" set, "On the Diaganol Die" from Lil' Inker Designs, cardstock from the Jillibean Soup's "Coconut Lime Soup" 6x6 paper pad, and "Banana Split" card stock from My Favorite Things as the base.  The second card, however, used one different stamp set....which was "Fancy Basics" for the sentiment. I also added some sequins from Lawn Fawn's "Into the Woods" lawn ornament set to the second card while the first card was embellished with some pearls from Doodlebug.
Its amazing how different they look when the main components of the cards are the same. I was super happy with how they both turned out and I must admit, they did indeed make me feel better! 

Enjoy :)

Wednesday, January 15, 2014

Lawn Fawn Birthday

I am in desparate need of some Birthday Cards so I decided it was a good time to make one and enter it into the latest Lawnscaping challenge that ends today.
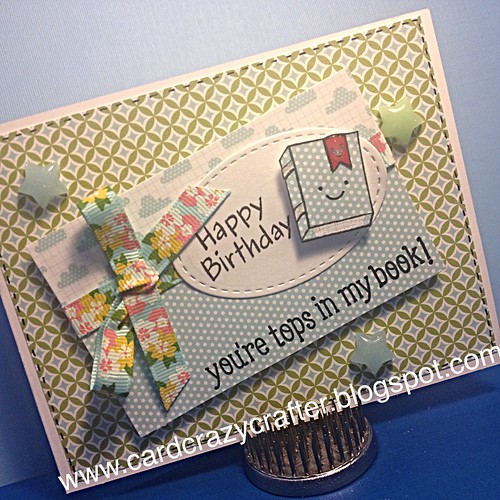
My main image...was stamped and paper pieced using a mix of Lawn Fawn card stocks...and is from the new set "Science of Love". I just love how well the card stock works together! I also used the Happy Birthday sentiment from the set "Bake me a Cake" which just fit perfectly in place. The fun glittery stars are from the "Delish Beads" website. They have such fun little embellishments there. If you haven't checked it out...I highly recommend it ;). And lastly, the ribbon just matched perfectly and was one that I had on hand from my local craft store.
Enjoy!